Showing posts with label entrees. Show all posts

Thursday, June 2, 2016

Gluten Free Taco Pasta Salad

There is about nothing I love better than pasta. I love pasta in mac and cheese. I love drenched in marinara sauce or Alfredo sauce. I love it baked into casseroles. And I love it eaten cold with a creamy dressing.

Pasta is a great vegetarian choice, as well. And this pasta salad has beans and cheese in it, which offer some added protein and deliciousness. 

This gluten free pasta salad is the perfect side dish for any meal, or a great lunch or mid-afternoon snack. It has just the right flavor, creaminess and texture.

Just prepare all of the ingredients and then throw them together in a big bowl...

Add the dressing...

And there you go! A delicious, easy pasta salad!


Gluten Free Taco Pasta Salad
  • 6 ounces Gluten Free Shell Noodles
  • 1 Cup Black Beans
  • 2-4 ounces Cheddar Cheese
  • 1/2 Cup Sour Cream
  • 1-2 teaspoons Taco Seasoning
  1. Cook the noodles as normal, rinse, and stick into the fridge until cool.
  2. Rinse and drain the black beans and cut the cheese into small cubes.
  3. Mix sour dream and taco seasoning together.
  4. In a large bowl, combine the cooled noodles, rinsed beans, cubed cheese and sour cream mixture. Stir it all together, then stick into the fridge until ready to serve. Makes about 4 servings.
I hope you enjoy it as much as I do!
-Bethany

Monday, March 21, 2016

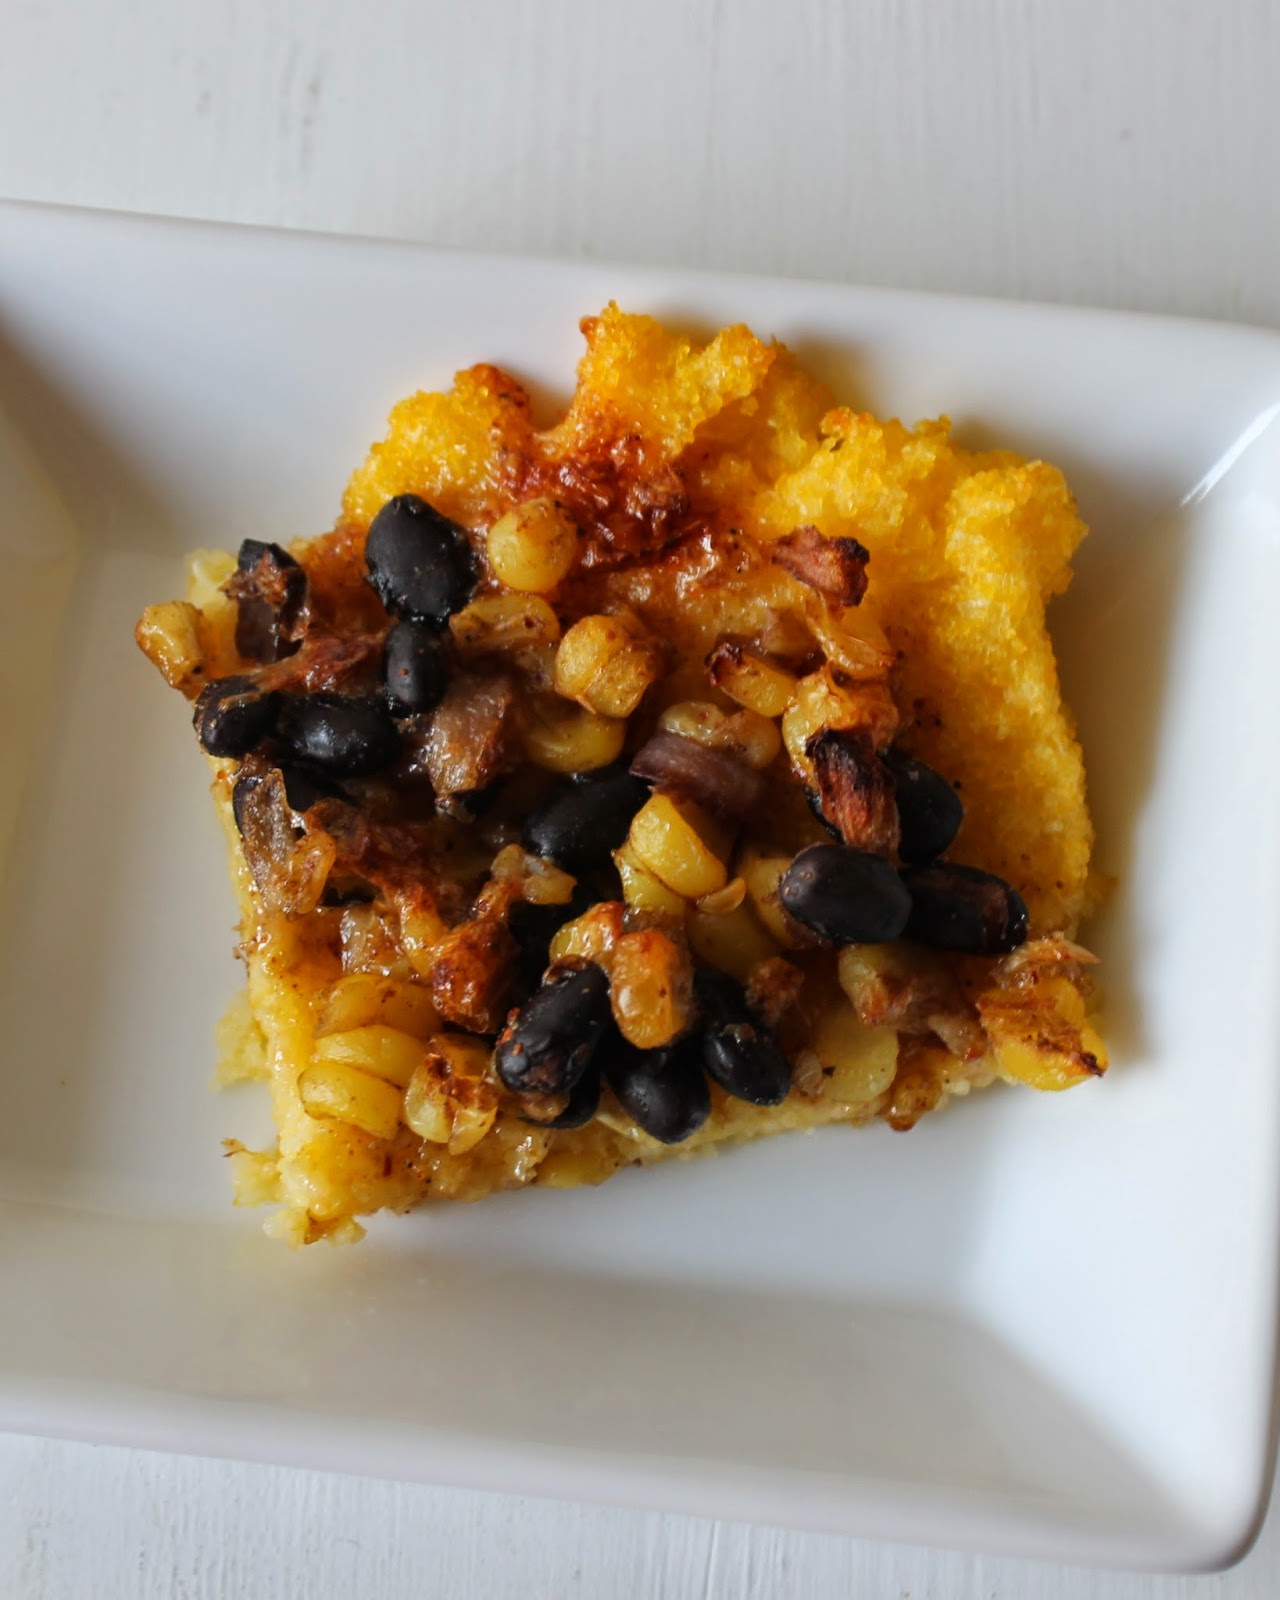
Gluten Free Enchilada Polenta Pizza

This Enchilada Polenta Pizza is packed with flavor and relatively easy to make. It is a great option for anytime you are in the mood for pizza and enchiladas at once, as it really captures both of those great foods. The crust is made with polenta, and it is topped with beans, corn, enchilada sauce and Monterey Jack cheese. It's a delicious and flavorful meal that you and your family will love it.

I have been making this enchilada polenta pizza a lot lately. It is fairly easy to put together, and I love the flavor combination. It has quickly become a favorite of mine.

First, start with a polenta crust...

Then add some beans and corn...

And then coat it in enchilada sauce...

 Then bake it for 15 minutes. Take from oven, add cheese to top, put back in and bake for 5 more minutes, until it looks like this.

Slice it up...

And dig in!


Gluten Free Polenta Enchilada Pizza
  • 2 Cups Water
  • 1/2 Cup Polenta
  • 1 Batch Enchilada Sauce
  • 3/4 Cup Black Beans
  • 1/4 Cup Corn
  • 1 Cup Monterey Jack Cheese, shredded
  1. Prepare 1/2 cup polenta with 2 cups water as normal.
  2. Grease a pan and spread the polenta onto it (making it about the size of a normal pizza). Cool in the fridge for 30 minutes or more.
  3. Preheat oven to 450 degrees.
  4. Top cooled polenta crust with enchilada sauce, black beans and corn.Bake for 15 minutes. 
  5. Remove from oven and add cheese. Bake for another 5 minutes.
  6. Remove from oven, slice and enjoy!

I know you'll love this recipe as much as I do!
-Bethany

Thursday, November 12, 2015

Easy Gluten Free Flour Tortillas

These gluten free flour tortillas are amazing. They are soft and roll-able, and they taste especially great when filled with beans, cheese and all of the toppings of your choosing. Plus, they are super easy to throw together! Give them a try and you will be sure to love them.


Easy Gluten Free Flour Tortillas
  • 1/2 Cup White Rice Flour
  • 1/4 Cup Cornstarch
  • 1/2 teaspoon Xanthan Gum
  • 3/4 teaspoon Baking Powder
  • 1/4 teaspoon Salt
  • 1 Tablespoon Butter, heated in microwave about 10 seconds
  • 1/4 Cup Water plus up to 2 Tablespoons more
  1. Whisk together the dry ingredients.
  2. Add the softened butter and mix in with fork or fingers. Add the water, enough until a soft, sticky ball forms.
  3. Divide into 3 to 4 balls and roll in rice flour.
  4. Cut off two sheets of plastic wrap and sprinkle one with rice flour. Put one ball on top and top with second piece of plastic wrap, roll out, and place the tortilla in a preheated pan. Cook about 30 seconds on each side. Repeat.
Adapted from this recipe.

-Bethany

Thursday, September 3, 2015

Easy Enchilada Casserole

This easy enchilada casserole is just that - easy! It is much simpler to put together than enchiladas, while using the same ingredients, flavors and textures. I love it!


It all starts with spooning some sauce into the bottom of the pan...

And then adding some torn tortillas...

And then adding in layer after layer of the good stuff!

Then bake...

And enjoy!

I know that I did.


Easy Enchilada Casserole
  • 6 to 8 Corn tortillas 
  • 1 batch (or 8 oz if using store-bought) Enchilada Sauce
  • 1 1/2 Cup Black Beans
  • 1/2 Cup Corn
  • 3/4 Cup Shredded Cheddar Cheese
  • 1/4 of a Red Onion Onion, optional
  • Taco Seasoning, optional
  1. Preheat oven to 375 degrees.
  2. Spread about one third of the sauce into the bottom of a 8x8 glass pan. Lay 3-4 tortillas down and spoon on half of the beans and corn. Sprinkle on some taco seasoning and half of the onion, if using. Top layer with about half of the remaining sauce, spreading it out a bit, and a third of the cheese.
  3. Repeat with the second round of tortillas, then the remaining beans, corn, a sprinkle of taco seasoning, onion, and the last of the sauce and the cheese.
  4. Cover pan with aluminum foil and bake for 25 minutes or so. Take off foil and bake for an additional 5 to 10 minutes. 
  5. Serve with sour cream. Makes 4 servings.

This casserole is seriously delicious, and so easy. I know that you will come to love it just as much as I do, once you give it a try!
-Bethany

Thursday, July 23, 2015

Easy Homemade Enchilada Sauce

I learned to make a few homemade sauces in the past year, and I never would have believed how simple it is to make them until I tried myself. Making homemade marinara, Alfredo, cheese sauce and enchilada sauce really is an easy task. I suggest that you try them all and see for yourself. Starting with this sauce.

Homemade enchilada sauce couldn't get any simpler than this recipe. I make it all of the time, and it takes me only a few minutes to get it all put together! So easy, and so good. Plus, with it being homemade, I can control the flavors that I put into it. Depending on the day I will put more cumin or chili powder in the sauce. I just do whatever I feel like in the moment.


Easy Enchilada Sauce
  • 1 (8 ounce) Can Tomato Sauce
  • 1 small Clove Garlic
  • 1 teaspoon Cumin
  • 1/4 teaspoon Chili Powder (or more, if you prefer it to be spicier)
  • 1/4 teaspoon onion powder or 1/4 cup Onion, chopped
  • Sprinkle of Oregano
  1. Put all of the ingredients in your blender and blend until smooth. 
  2. Pour into a saucepan and cook for 5 minutes.
  3. Makes enough for an 8x8 pan of enchiladas. 
There you have it! Now you can easily make your own homemade enchilada sauce, too!
-Bethany

Thursday, May 14, 2015

Zucchini Enchilada Casserole

I love Mexican food.

I could eat enchiladas all of the time, which is why this recipe is so great. A healthy version of enchiladas just gives me an excuse to eat Mexican all the more often!

I just threw together some veggies, beans and taco seasoning...

And stirred it all together...

Spread it into a pan and topped it with cheese...

And then baked it and ate it. 


It was delicious. So fresh and flavorful. Yum. I want to eat this again. Like, right now.


Zucchini Enchilada Casserole
  • 3 Small Zucchinis
  • 1 (14.5 oz.) can Diced Tomatoes
  • 1 3/4 Cup Black Beans
  • 3/4 Cup Corn (frozen or canned)
  • 1/2 Red Onion (optional)
  • 1 Tablespoon Taco Seasoning
  • 1 Cup Cheese, shredded (I used Colby Jack)
  1. Preheat oven 375 degrees.
  2. Chopped the zucchinis into small, even size pieces. 
  3. Drain the diced tomatoes.
  4. Add all ingredients beside the cheese into a bowl and toss together. Dump into a greased 8x8' or 9x13 inch. pan.
  5. Top with cheese.
  6. Bake for 20 minutes covered (or longer if in a smaller pan) and then take the foil off and bake for another 5-10 to get the cheese melted.
  7. Serves: 4-6
Enjoy!
-Bethany

Saturday, May 2, 2015

Homemade Creamy Gluten Free Mac And Cheese

There is nothing more enjoyable or fulfilling than gathering some ingredients together and making a meal. Especially when that meal involves cheese.

 (speaking of cheese, the one ingredient missing from the picture is Parmesan cheese. Oops.)

And pretty gluten free macaroni noodles.

A little stirring here, a little measuring there, and a creamy cheese sauce appeared. I added the cooked noodles and ended up with this gooey, cheesy, delicious supper.


If you want to make this perfect, creamy gluten free macaroni and cheese for yourself, here is the recipe.

Homemade Creamy Gluten Free Mac And Cheese
  • 2 Tablespoons Butter
  • 2 Tablespoons Cornstarch
  • 1/2 Cup Heavy Cream
  • 1/2 Cup Milk
  • 1/4 Parmesan Cheese
  • 1 1/2 Cheddar Cheese
  • Salt and Pepper, to taste
  • 12 oz. Macaroni Noodles
  1. Cook noodles as normal.
  2. In a large pan, melt butter. Add the cornstarch and cook for about one minute.
  3. Turn heat down a bit and slowly add in heavy cream and milk and whisk until thickened slightly.
  4. Add Parmesan and cheddar cheeses stir until melted. Add salt and pepper to taste. If the sauce appears too thick, add a bit (up to 1/2 cup) of the pasta water.
  5. Drain the noodles and add to the cheese sauce. Stir to combine.
  6. Serve and enjoy.

-Bethany

Thursday, February 26, 2015

Spinach and Chickpea Alfredo

I have been having fun experimenting with different dishes these past several months and happened upon an amazing, easy Alfredo sauce, which is the base for this dish.  I added in some spinach and chickpeas, and here it is!


Gluten Free Spinach and Chickpea Alfredo

  • 1/2 Cup Heavy Whipping Cream
  • 2 Tablespoons Butter
  • 1 Cup Grated Parmassen Cheese
  • Salt and Pepper, to taste
  • A couple handfuls of Spinach
  • 1 Cup Chickpeas
  • 8 Ounces Gluten Free Pasta
  1. Boil water for pasta and make according to directions
  2. In a small saucepan heat the butter and heavy cream, until the butter is melted.
  3. Grate the cheese and add it to the butter/cream mixture. Stir until melted and add in some salt and pepper, to taste.
  4. Heat the chickpeas in the microwave, about one minute.
  5. Drain noodles and add back to pot. Add in a couple of handfuls of spinach, chickpeas and sauce. Stir until the spinach is slightly wilted. Enjoy.

Adapted from this recipe.

-Bethany

Saturday, February 14, 2015

Creamy Chickpea Taco Salad

I love chickpeas.
I could eat them for breakfast, dinner and lunch.
And, yeah, okay... sometimes I do.

Chickpeas are amazing. So versatile and healthy and yummy... if you're not a big fan of them yet, give them a try. You'll be sure to fall in love with them before long, just like I did.

Now I don't know what to do when I have to go a day without them (like today). I have them soaking, though, so I can make them for tomorrow!


Oh, yum... these pictures are making me want this salad bad!


Creamy Chickpea Taco Salad For One
  • 3/4 Cup Chickpeas
  • 1 Tablespoon Sour Cream
  • 1 Ounce Cheese, cut into small chunks
  • 1/4 teaspoon Taco Seasoning (make sure it's gluten free)
  1. Cut the cheese. Add the chickpeas, sour cream, cheese and taco seasoning to a bowl and stir to combine.
  2. Taste and add a bit more seasoning if you like. Enjoy!

Creamy Chickpea Taco Salad
Serves 4-6
  • 2 Cans Chickpeas, drained
  • 1/4 Cup plus 1 Tablespoon Sour Cream
  • 1 Cup Cheese, Cut into Chunks
  • 1 1/4 teaspoon Taco Seasoning (make sure that it's gluten free)
  1. Cut the cheese. Add the chickpeas, sour cream, cheese and taco seasoning to a big bowl and stir to combine.
  2. Taste and add a bit more seasoning if you like. Enjoy!

Chickpeas really are so good. 
And this salad... oh my. So good.
-Bethany

Thursday, January 15, 2015

Hummus Sandwich

If you are looking for a good, easy and inexpensive vegetarian sandwich, this is the one for you.

The hummus is garlic-y and delicious, the pickles adding some acidity, the cheese balancing it all off... you won't even notice that the meat is missing.


Hummus Sandwich
  • Garlic Hummus
  • Cheese
  • Pickles
  • Optional, any vegetables of choice
  1. Prepare your hummus.
  2. Lay out two gluten free bagels, or bread of choice, and spread a good amount of hummus on the bottom piece.
  3. Slice the cheese and pickles (and vegetables, if using) and place on top of the hummus. Top with other half of bagel and enjoy.

Hope you like it as much as I do!
-Bethany

Thursday, December 18, 2014

Baked Chickpea Meatballs


I made these chickpea meatballs a couple of weeks ago, and they turned out great. They were so good, in fact, that I have been craving them the past few days. 


Baked Chickpea "Meatballs"

  • 2 Cups Chickpeas
  • 1/3 Cup Gluten Free Breadcrumbs
  • 1 Tablespoon Ground Flaxseed
  • 3 Tablespoons Hot Water
  • 2 Cloves Garlic, Minced
  • 1 teaspoon Dried Oregano
  • 1/2 teaspoon Salt
  • 1/2 teaspoon Onion Powder
  • 8 cranks freshly ground black pepper (or really, however much you'd like)
  1. Heat the water and add the ground flaxseed to it. Set aside for 10 minutes.
  2. Preheat oven to 350 degrees.
  3. In a blender, pulse chickpeas until small crumbs form (almost fine).
  4. Mince the garlic.
  5. Add the chickpeas, flax-egg, garlic and the remaining ingredients to a big bowl and mix until combined.
  6. Shape into 2 Tablespoon size balls of dough and set on a cookie sheet that has been sprayed with cooking spray.
  7. Bake for 20 to 30 minutes, until slightly browned. Serve with sauce on spaghetti, and enjoy!


Adapted from this recipe.

-Bethany


Monday, November 17, 2014

Recipe: Easy Homemade Taquitos

I first made these a couple of months ago, as I am always on the lookout for new Mexican dishes, and they were an instant hit! 
They are super crunchy and delicious and they are a great, different way to eat your corn tortillas.


Flautas
  • Tortillas
  • Cooking Spray
  • Filling (whatever filling you'd like)
What we like to use:
  • Black Beans
  • Corn
  • Red Onion, finely chopped
  • Garlic, minced
  • Cheddar Cheese, grated
  • Taco Seasoning
Make a big batch of this mix, using as much or little of each ingredient as you like, and freeze any leftovers for later (it's also amazing on polenta pizza!).
  1. Preheat the oven to 425 degrees.
  2. Place a cooling rack on top of a baking sheet (that's big enough to hold it).
  3. Wrap a moistened paper towel around a few tortillas and microwave for about 30 seconds. 
  4. Take the softened tortillas, spray one side with cooking spray, and place a couple spoonfuls of filling inside, then roll and place on the rack, securing with a toothpick or two. Repeat until all the tortillas have been used.
  5. Bake in the preheated oven for about 15 minutes, then turn to broil and let them in for one more minute.
  6. Serve with sour cream and enjoy!
Directions in how to make them is thanks to this recipe.

-Bethany


Wednesday, November 5, 2014

Recipe: Polenta Pizza

To be honest, the first time that my sister made this recipe, I was a bit skeptical. I mean, pizza is pizza, right? Who wants a polenta crust. I thought that it wouldn't be any good.
But, I was wrong. Totally and completely wrong.
This stuff is amazing and just another great way to eat my favorite Mexican toppings! I love it.


Polenta Crust
  • 1 Cup Gluten Free Polenta
  • 1/2 Cup Milk
  • 2 1/2 Cups Water
  1. In a medium saucepan combine the water and milk. Bring to just about a boil and turn to medium heat. Whisk while adding the polenta in a steady stream.
  2. Turn the heat to low and whisk occasionally for about 10 to 15 minutes, until the consistency is that of oatmeal.
  3. Grease a baking sheet and spread out the polenta as thick or thin as you would like your crust to be. Chill in the fridge 30 minutes.
  4. Preheat oven to 450 degrees.
  5. Top your polenta crust (suggestions below) and bake for about 20 minutes, or until just beginning to brown around edges.

Mexican Toppings:
  • Black Beans
  • Corn
  • Red Onion
  • Chedder Cheese
  • Taco Seasoning (make sure it's gluten free) 
Mix together toppings and spread it all out over the prepared crust. You can put salsa on the crust beneath the toppings for added flavor, if desired.
Original recipe found here.


I hope you give it a try! You won't regret it, I promise. :)
-Bethany

Linking up to The Weekend Potluck.